
Note: Important mail from your instructors and the University will be sent to your USI email account. It is IMPERATIVE that you check your USI email on a regular basis.
If you prefer to use an email account other than the one provided you by USI, you can forward your USI email to a functioning account that you access regularly. If you forward to a non-functioning or non-existent email account, you could potentially lose important email messages. It is your responsibility to periodically test the forward to see that it works.
Visit the USI Knowledge Base for more email FAQs.
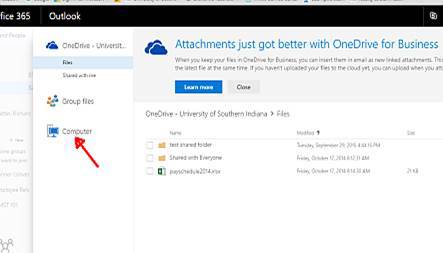
Sending an attachment can be tricky – as eagles mail will want to default to getting files from your One Drive. Also, the default is to send a HYPERLINK to a file on the One Drive vs. actually sending the file.
So, if you want to send the FILE – and not a link – follow these instructions.
The Upload and attach method will put the file in your OneDrive, and give the email recipient access to this file. Using this method, sends the email recipient a LINK to your document – it does not put the file in the email. The recipient can NOT forward the document to someone else.
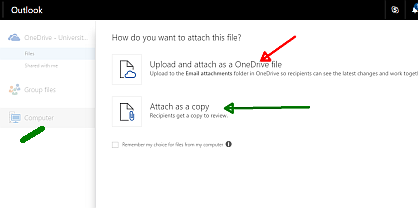
IF you choose Upload and attach, you are then given the choice to change permissions to Read Only or Edit permissions.
WHY has Microsoft gone to the OneDrive method?
Many people work from mobile devices. If your files are in your OneDrive, you have them available to you on your phone, tablet, AND computer. Many devices have limited amounts of storage – but we have a very large amount of space in our OneDrive.
Create Rule to move messages to folder based upon sender address or specific words in the subject. Two Step Process
First: Turn on the Junk Filter
Second: Create Rules to Block Messages By keyword or sender address
Create a Rule if you are repeatedly getting the same kind of email
Example: "Click here to apply for a $500/ a week job" filter by "specific words in subject" option
If a specific email keeps sending various messages filter by "move messages from someone" option
Name the Rules and be sure to Click Save at the Bottom.
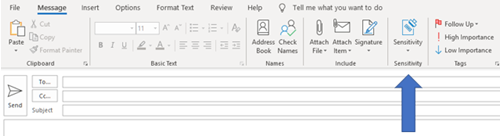
1.) Create a new email
2.) Select the Sensitivity tab on the right
3.) Choose what type of encryption you prefer. (Critical is suggested)

In Outlook:
First tell Outlook WHERE you want to look – in the top right it shows the folder you currently have highlighted (I’m guessing Inbox). If you want to search beyond the Inbox – click the BROWSE button. You actually can scroll to the top and choose MAILBOX – your name. This will search your entire mailbox (including Calendar, Contacts, Deleted Items, Inbox…).
If you want to SEARCH SUBFOLDERS under the selected folder/mailbox – then check the box at the bottom. Click OK.
Next decide if you want to ONLY look in Mail items – or if you want to include Calendar-type items, Notes-type items… You make this change in the top left corner of the Advanced Find window. I typically choose ANY TYPE OF OUTLOOK ITEM.
At this point you can enter your search word/phrase in the “Search for words” box. If you KNOW the word(s) are in the Subject field – then let this default – or change to search the body of messages.
If you know the FROM/TO items – you can fill in these boxes to refine your search – otherwise leave blank.
This is typically all the functions "I" use for the Advanced search. You can check out the other tabs for a more detailed search. When the search is done – it should show you the results in a new window. This window should show you WHAT FOLDER the items are located in. Pay attention to this, it is important.
If you are getting the System Administrator message that your mailbox is too full, you can use the following tool to find out what messages or folders are causing this problem. After you narrow down where the problem is, you can delete, archive or move to a personal folder.
It is not the NUMBER of items that matter, but the total SIZE of all items.
Some people have been surprised to find that they were over the limit due to items in their calendar or tasks folder.
Reminder
Warning at 170000 KB
Prevent SEND at 180000 KB
Prevent SEND and RECEIVE at 200000 KB
(mailbox size increased from 140/150/170 on 5/25/2011).
To find out which items in your mailbox are causing you grief, do the following
Click FILE,
Click CLEANUP TOOLS
Click Mailbox Cleanup
Click VEIW MAILBOX SIZE
At the top of the Folder size window, you should see "Total size (Including subfolders). This tells you the TOTAL amount of space you are currently using.
Scroll down through the list of folders using the SIZE column and see which folders are using the most space. Many times just knowing this, helps to figure out what needs to be deleted/archived. It might be your Sent items or Deleted items folder. The TOTAL SIZE column can be misleading - this figure will include the nested subfolders.
If this does not clear things up for you, click Close and then select the "Find items larger than" button and change the value to 1000 and click FIND. The results should show you all the items in your mailbox that are larger than 1MB. It will tell you what folder these items are in (not necessarily the Inbox).
From the mailbox cleanup window you can also force an archive, or empty your deleted items folder.
Create Rules to move messages to a specific folder based upon sender address or specific words in the subject.
Read the answer to the next question to learn about Outlook rules
Create a Rule if you are repeatedly getting the same kind of email.
Rules can filter by words in sender address, subject line, words in message headers, plus more.
If a specific email keeps sending various messages filter by "move messages from someone" option
Blocking Emails related to Spam
1. Right click a message you recognize as spam or has malicious intent.
2. Navigate to the Junk tab.
3. Click "Block Sender".
Quick Steps is a feature that applies multiple actions at the same time to email messages. This helps you quickly manage your mailbox. For example, if you frequently move messages to a specific folder, you can use a Quick Step to move the message in one click. Or, if you forward messages to your manager or peers, a one-click Quick Step can simplify the task.
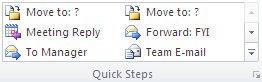
You can customize any of the default Quick Steps. When you use some Quick Steps for the first time, you are prompted to configure them. For example, if you want a Quick Step to move messages to a certain folder, you must specify the folder before you can use the Quick Step.
Default Quick Steps in Outlook 2010 include the following:
|
Quick Step |
Action |
|
Move to: |
Moves the selected message to a mail folder that you specify and marks the message as read. |
|
To Manager |
Forwards the message to your manager. If your organization uses Microsoft Exchange Server, your manager's name is detected in the Global Address List and inserted in the "To" box, or you can specify the recipient. |
|
Team E-mail |
Forwards the message to others in your team. If your organization uses Microsoft Exchange Server, your team members names are detected in the Global Address List and inserted in the "To" box. |
|
Done |
Moves the message to a specified mail folder, marks the message complete, and then marks it as read. |
|
Reply & Delete |
Opens a reply to the selected message, and then deletes the original message. |
|
Create New |
Create your own Quick Step to execute any sequence of commands, name it, and then apply an icon to help you identify it. |
To configure or change existing Quick Steps, do the following:
In Mail, on the Home tab, in the Quick Steps group, click the More  arrow at the side of the Quick Steps box, and then click Manage Quick Steps.
In the Quick Step box, click the Quick Step that you want to change, and then click Modify.
Under Actions, change or add the actions that you want this Quick Step to do.
If you want, in the Shortcut key box, click a keyboard shortcut that you want to assign to that Quick Step.
If you want to change the icon for a Quick Step, click an icon next to the Name box, click an icon, and then click OK.
In Mail, on the Home tab, in the Quick Steps group, in the Quick Steps gallery, click the Create New Quick Step.
Click an action type from the list or click Custom.
In the Name box, type a name for the new Quick Step.
Click the icon button next to the Name box, click an icon, and then click OK.
Under Actions, choose an action that you want the Quick Step to do. Click Add Action for any additional actions.
To create a keyboard shortcut, in the Shortcut key box, click the keyboard shortcut that you want to assign.
NOTE: New Quick Steps appear at the top of the gallery on the Home tab in the Quick Steps group. Although changed Quick Steps keep the same location in the gallery, you can rearrange them in Manage Quick Steps.
Use the Quick Parts Gallery to create, store, and find reusable pieces of content, including AutoText, document properties such as title and author, and fields.
AutoText is reusable content that you can store and access again and again. Click AutoText to access the AutoText gallery. You can save AutoText to the AutoText gallery by selecting the text you want to reuse, clicking AutoText, and then clicking Save Selection to AutoText Gallery. By filling in the new building block information you store the content you save to use again and again.
Click Document Property to choose from a list of properties that you can insert in your document. Fill in the document property box to create properties that travel with your document.
Use field codes to insert fields that can provide automatically updated information, such as the time, title, page numbers, and so on.
Click Building Blocks Organizer to preview all of the building blocks available to you in Word. You can also edit properties, delete, and insert buildings blocks.
Select a phrase, sentence, or other portion of your document. On the Insert tab, in the Text group, click Quick Parts, and then click Save Selection to Quick Part Gallery.
After you save a selection to the Quick Part Gallery, you can reuse the selection by clicking Quick Parts and choosing the selection from the gallery.
Open the Address Book dialog box.
In Outlook 2016, click Address Book button in the Find group under Home tab. See screenshot:
In the Address Book dialog box, select Global Address List in the Address Book drop-down box, then click Advanced Find.
In the Find dialog box, enter your search conditions in the corresponding fields, and then click the OK button.
Then the contacts in the Global Address List which meet the search conditions will be listed in the Address Book dialog box immediately.
Note: If there is only one search condition you need to search for the contact, you can select the More columns option, enter the search condition to the blank box, then click the Go button. See screenshot:
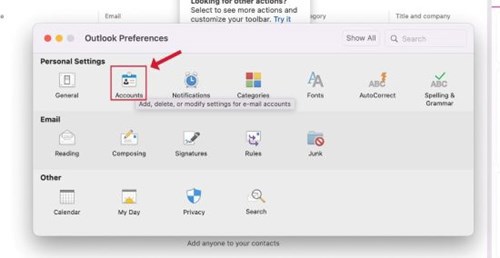
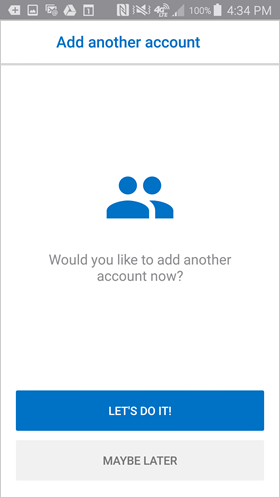
Step 1: Open the main Outlook menu and select Preferences.
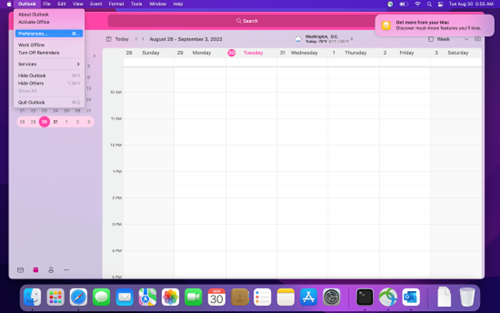
Step 2: Select Accounts.
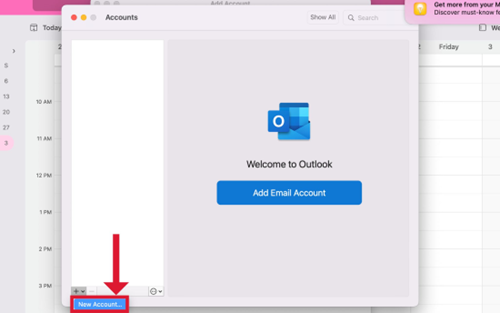
Step 3: Click the + button, then select New Account.
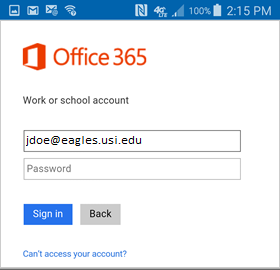
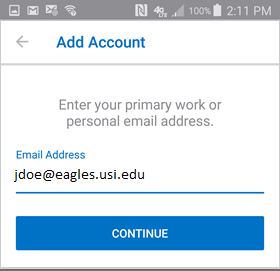
Step 4: Enter your USI email address
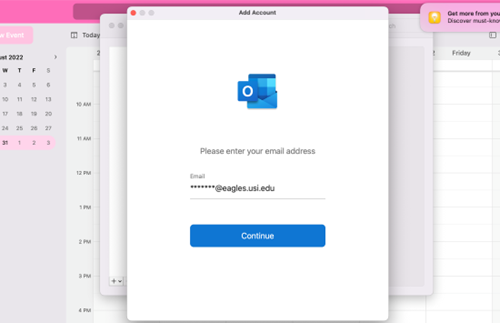
Step 5: You will be taken to the Okta login page to sign in using MFA.

For more information on MFA, click here
If you want to check who has permission to your calendar, and possibly remove someone’s permission do the following:
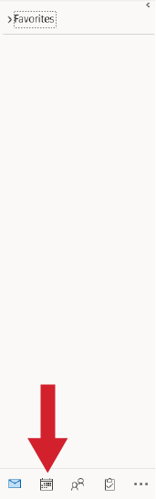
Go to your calendar (example using OUTLOOK – not web mail)
Click the Calendar Icon located on the bottom left.
Here, you will see all of your calendars. Right click the calendar you wish to modify and click Sharing Permissions.
Now you will see who has permission to your calendar and their permission level.
If you have an entry called "My Organization" with the permission level "Can view when I'm busy," it does not need to be deleted (in fact, it cannot be deleted).
IF you have an entry for ANONYMOUS – that is OK to leave in the permissions – make sure it is set to NONE. If you don’t see an entry for Anonymous – don’t worry.
The various permission levels include:
| None |
| Can view when I'm busy |
| Can view titles and locations |
| Can view all details |
| Can edit |
If you need to change someone's permission level - highlight their name, click the new permission level you want to give them, Apply, OK.
If you find someone you need to remove from sharing your calendar – highlight their name, click Remove, Apply, OK.
1.) Create a new email
2.) Select Encrypt on the top of the new email
3.) You can change the required permissions for opening the email.
Mobile Specific Questions
Newer iOS instructions:
Settings / Calendar / Default Calendar - select the USI account
*** OLDER iOS instructions below ***
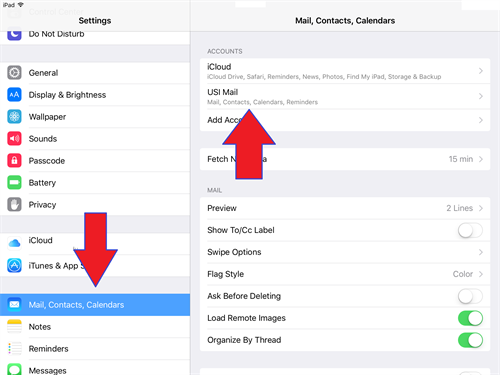
1. Go to Settings, select Mail, Contacts, Calendars.
2. Select USI Mail (it may show as Exchange).
3. Select Default Calendar (bottom right).
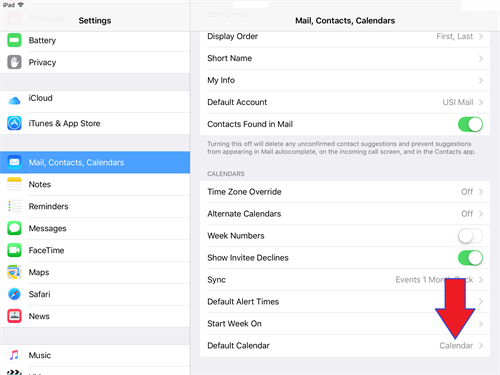
4. Using the image below - you see there are multiple calendars for each account. Below example has "on my ipad" and "USI Mail". Select the Calendar under USI Mail/exchange. A small check mark should appear.

Newer iOS instructions:
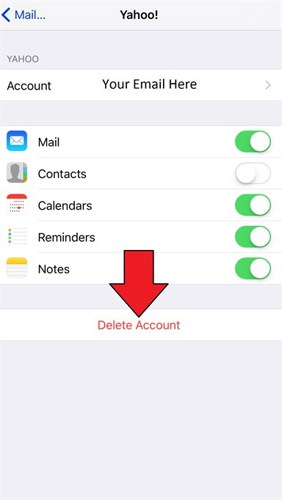
1) Setting / Passwords & Accounts / Select your USI account / Delete Account
*** OLDER iOS instructions below ***
These are the steps for an IOS based device.

4. Scroll to the bottom and press Delete Account.
Click Settings at the bottom right. The Focused Inbox toggle is near the bottom of the Settings page. The change should take effect immediately.

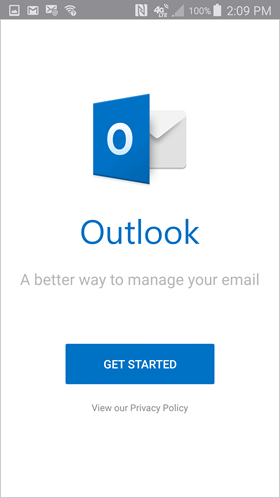
Due to security changes, you can no longer use the Android Mail app with a USI account. You should use the Microsoft OUTLOOK App.
To delete your USI account on the Android App
1) Open your email app (red icon). If you are having trouble finding it, swipe upward from your Home Screen, then tap inside the search bar and type "email"
2) Tap on the three vertical dots in the top right (some versions this will be 3 horizontal lines on top left)
3) Tap the Gear/Settings icon.
4) You should see all the accounts set up on this Mail App. Find the USI account and Tap on it.
5) Tap REMOVE in the top right corner - confirm.
***
There may have been some recent changes to the Android mail app- if the above settings do not work try this:
1) Click the red Samsung email app icon
2) Click the "hamburger" icon in top LEFT - looks like 3 horizontal lines
3) Click the Gear/settings icon (top right)
4) Select/click the USI account
5) Click REMOVE (top right).
****
If after removing your USI email account from the Android mail app - you may find that the Contacts in the CONTACTS App disappear - don't despair. Follow the following steps:
To sync your USI Contacts with the Android Contacts App
1) Set up the Outlook App
2) Start Contacts App on device
3) Click the ... in the top right
4) Choose Manage Contacts
5) Choose Sync Contacts
6) Find your OUTLOOK icon that shows your USI address and turn that ON
Click 3 dots on the right, then Settings.
Toggle Focused Inbox off. You'll need to close and restart the Outlook app for the change to apply.